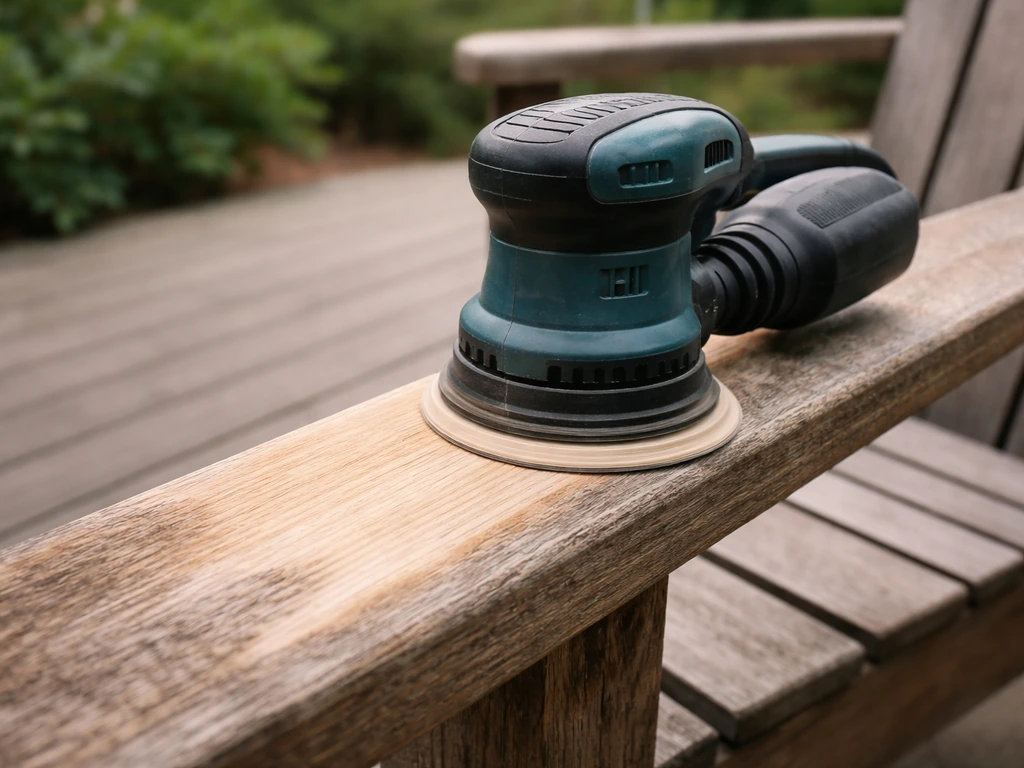
For most wood patio furniture, a 5-inch random orbital sander is the right tool. It handles paint removal, smoothing, and finish prep without gouging the surface, and it works on flat panels, chair arms, and table aprons equally well. For tight spindles and carved details, pair it with a detail sander or hand-sanding with a foam block. Metal furniture needs a slightly different approach, with a flap disc or wire cup on an angle grinder for heavy rust, then the random orbital for final prep. Composite and plastic furniture barely needs sanding at all, and power sanding it aggressively can melt the surface permanently.
Best Sander for Patio Furniture: Types, Grits, and Specs

Theo Tierney
20 Jun 2026
Match the sander to your furniture material first
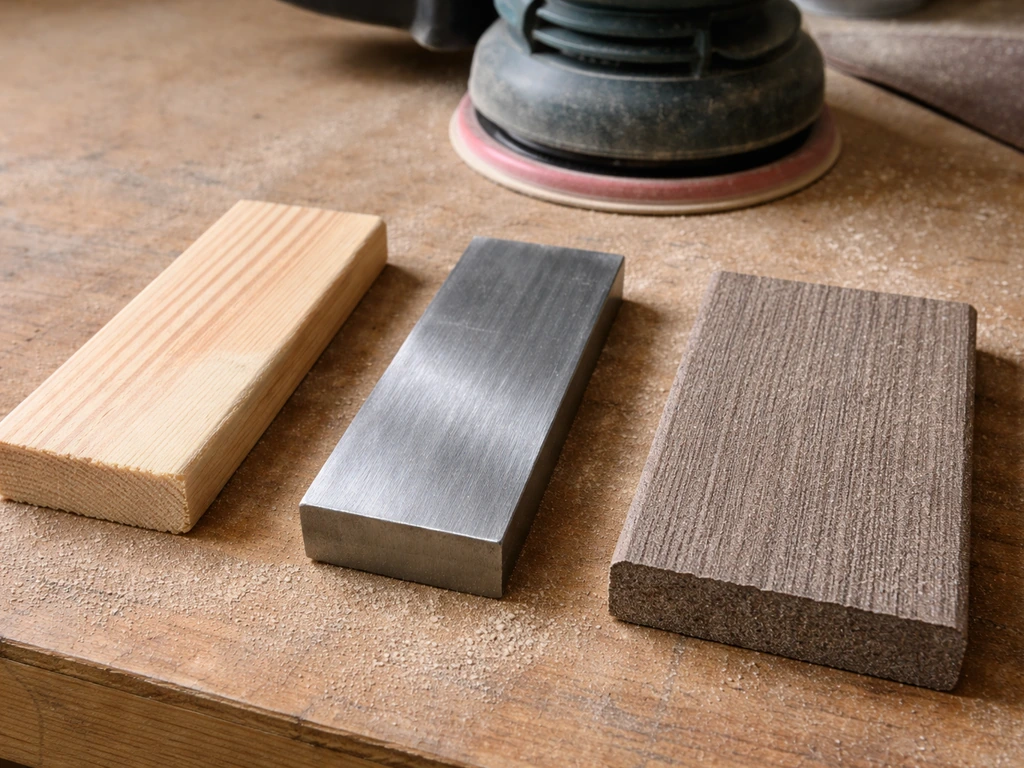
The single biggest mistake people make is grabbing whatever sander is in the garage and going at it. Different materials respond completely differently to abrasion, heat, and pressure, and getting it wrong means permanent damage you cannot fix without replacing parts.
Wood is the most forgiving material to sand, but it still punishes aggressive technique. Teak, cedar, eucalyptus, and pine all have soft-to-medium grain that will show swirl marks if you rush the grit progression or lean on the sander. The goal is to cut the old finish cleanly, not scorch or burnish the wood fibers. A random orbital sander handles the flat runs beautifully. For spindles, rungs, and carved profiles, you need a detail sander or hand-sanding with a contour block.
Metal furniture, usually powder-coated steel or cast and extruded aluminum, requires rust prep before anything else. Surface rust on steel needs mechanical removal, either a wire brush wheel on a drill or a flap disc on a small angle grinder, before you bring in a fine-grit orbital. Aluminum does not rust but its powder coat can chip and peel, and a random orbital with 120-grit works well for scuffing it without cutting into the soft metal. Heavy rust requires coarser abrasives and a chemical metal prep step that no sander alone can fully replace.
Composite and plastic furniture is where most people cause irreversible damage. PVC-based composites have a low melting point, and even a moderate-speed random orbital can soften or distort the embossed wood-grain texture, leaving shiny scuff marks that become permanent. If you need to scuff a composite chair or table for repainting, use 120-grit sandpaper by hand or a sanding block at light pressure. Skip the power sander entirely for composite unless you are spot-sanding a burr or rough edge with a very fine grit and extremely light passes.
The four sander types and when each one belongs on patio furniture
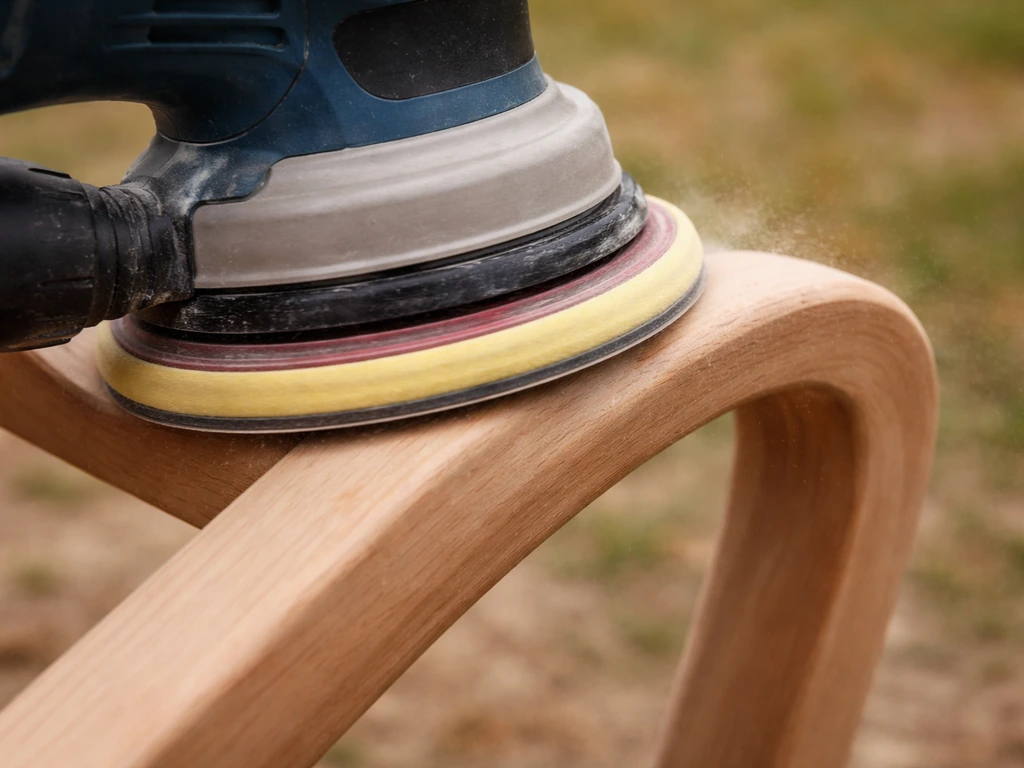
Random orbital sander: the one tool to own
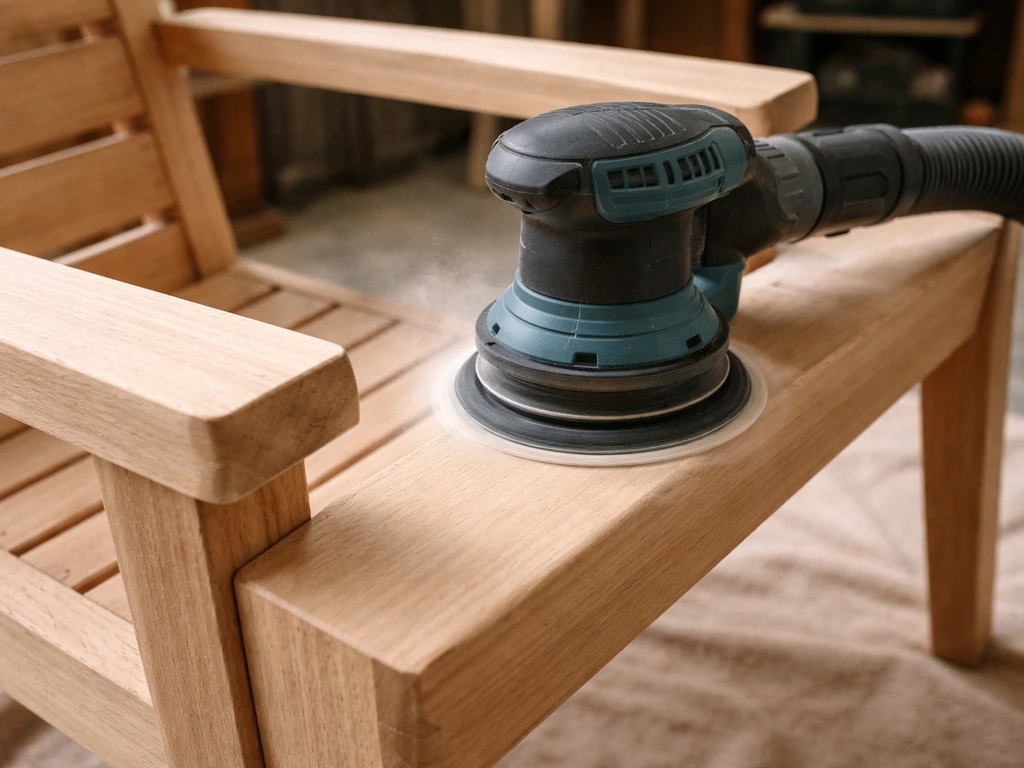
A 5-inch variable-speed random orbital sander is the workhorse for patio furniture refinishing. The random orbit pattern (the pad spins and orbits simultaneously) breaks up the circular scratch pattern that a standard orbital leaves, which means you get far fewer swirl marks in the final finish. Variable speed matters outdoors: lower speeds around 2,500 OPM for final smoothing and higher speeds up to 6,800 OPM for initial paint removal give you real control over how aggressively you are cutting.
For most homeowners doing a full strip-and-refinish on a teak dining set or cedar Adirondacks, this is the only power sander you need. Once the sanding and grit prep are right, the best varnish for patio furniture is the one formulated for outdoor UV and water resistance.
Orbital (sheet) sander: limited use, occasional value
A standard orbital sander uses quarter-sheet sandpaper and moves in a fixed elliptical orbit. It is less aggressive than a belt sander and costs less than a random orbital, but it leaves a more visible scratch pattern. For flat tabletops where you plan to paint rather than stain (so the grain is hidden), an orbital sander is acceptable for intermediate smoothing. If you are going to stain or apply a clear oil finish, the swirl pattern will telegraph through, and you need to follow up with a random orbital or hand-sanding along the grain before finishing.
Belt sander: heavy removal only, use carefully
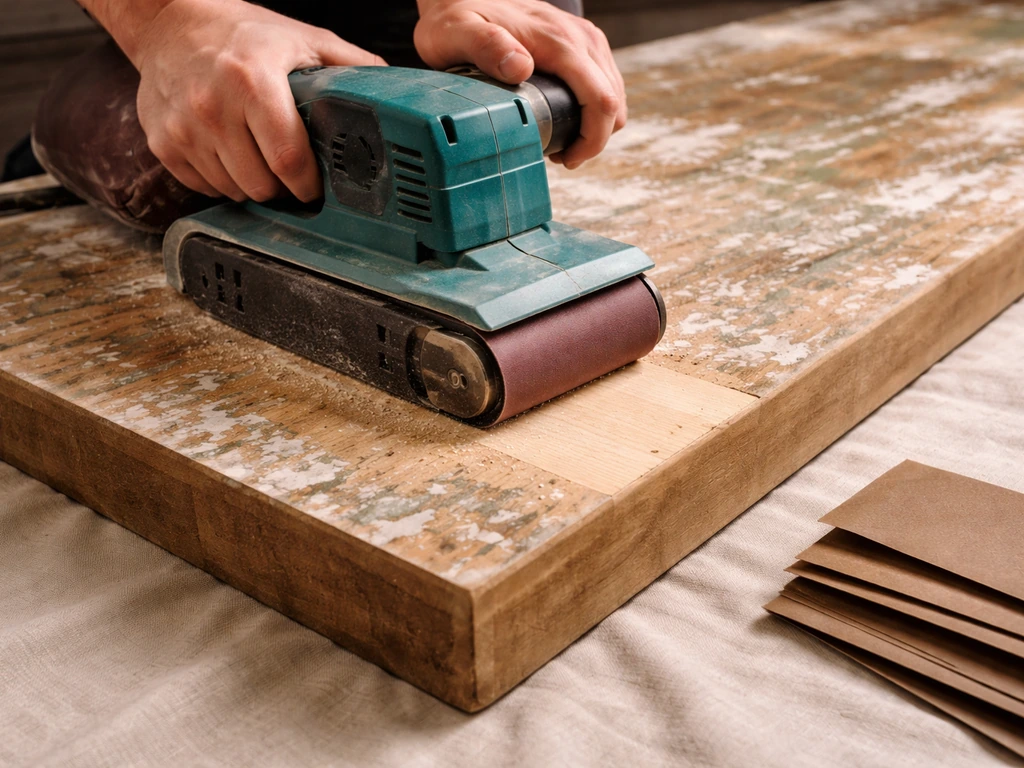
A belt sander removes material fast, which sounds appealing when you have a picnic table caked in five layers of old paint. The problem is it removes material very fast, and on furniture-scale pieces with narrow boards, leg joints, and edge profiles, you can sand through a thin slat or round over an edge in seconds. If you use one, keep it moving constantly, work strictly parallel to the grain, and stop at 80-grit. Hand it off to the random orbital for everything after that. On wide, flat tabletops with heavily built-up old paint, a belt sander can save real time. On chairs, benches, or anything with shaped components, leave it in the truck.
Detail and oscillating sanders: essential for chair frames
A detail sander with a triangular pad or a multi-tool with sanding attachments is the only realistic way to get into inside corners, spindles, and the junction where a chair leg meets a seat slat. They are slow, but they are precise. For outdoor chair sets, budget time to hand-sand all the spindles and corners even after the random orbital has done the flat work. Sanding profile shapes is one place where a folded piece of sandpaper wrapped around a dowel or a rubber contour block works better than any power tool.
| Sander Type | Best For | Avoid Using On | Key Limitation |
|---|---|---|---|
| 5-inch Random Orbital | Wood flat panels, metal scuff prep, most patio furniture | Composite/PVC furniture, tight spindles | Needs grit progression to avoid swirl marks |
| Standard Orbital (sheet) | Flat tabletops destined for paint, quick leveling | Stain or clear-finish projects, shaped parts | Leaves visible scratch pattern under stain |
| Belt Sander | Wide flat tops with heavy old paint buildup | Chair frames, narrow slats, anything shaped | Removes material very aggressively, easy to gouge |
| Detail / Multi-tool | Inside corners, spindles, carved profiles | Large flat surfaces (too slow) | Slow; mostly supplemental to orbital work |
Grit progression: which grits to use and in what order
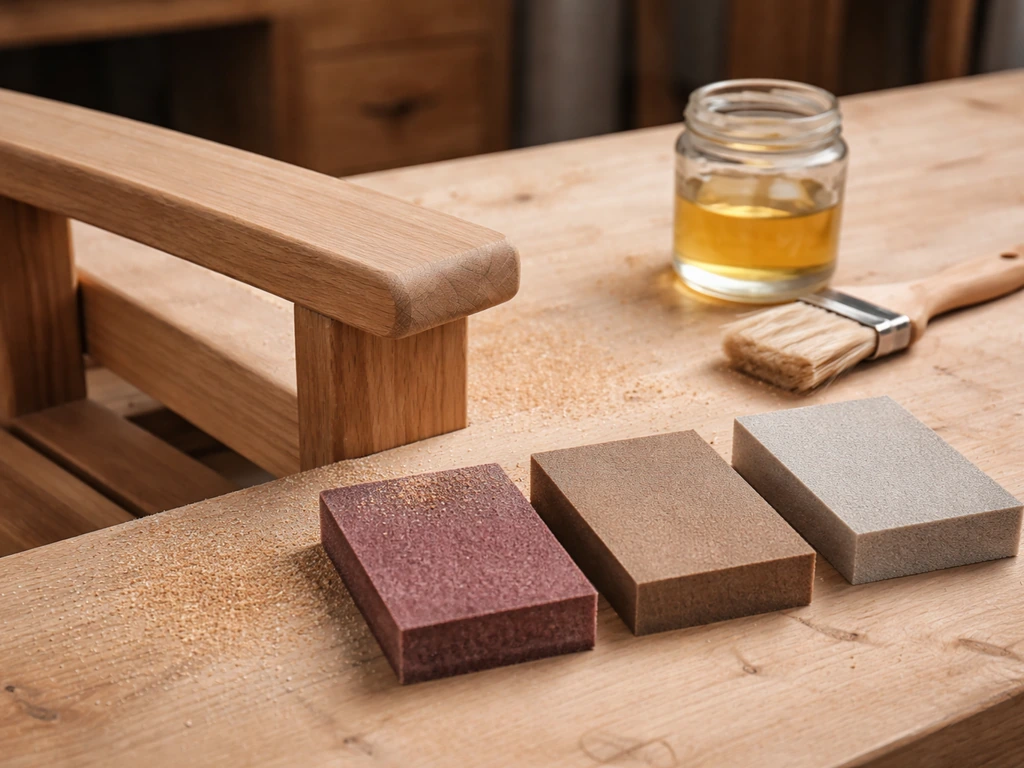
Grit selection depends on what you are starting with. The rule that matters most: do not skip more than one grit step. Each grit removes the scratches left by the previous one. If you jump from 60-grit to 220-grit, you will spend an hour trying to sand out deep scratches with paper that cannot remove them efficiently.
Stripping old paint or heavily weathered finish
Start at 60 or 80-grit to break through old paint, varnish, or heavily oxidized finish. Once the old coating is off and you are down to bare wood or the substrate, move to 120-grit to knock down the 80-grit scratches. From there, 150-grit for smoothing, then 180-grit before you apply paint or a solid stain. Professionalsandpaper.
com also lays out a common sanding schedule for wood refinishing: start around 80-grit for removal, move through 120 and 150, and finish around 180 before paint or around 220 before stain From there, 150-grit for smoothing, then 180-grit before you apply paint or a solid stain. . If you are applying a penetrating oil or clear stain where the grain will show, continue to 220-grit for the final pass.
A good sealant for wood patio furniture should be chosen based on whether you are finishing with oil, penetrating stain, or a clearer protective topcoat penetrating oil or clear stain. Stopping at 180 before an oil finish can leave the surface slightly more open, which helps the oil absorb, but 220 gives a cleaner appearance. Test a small area with your chosen finish to decide.
Lightly weathered wood needing a refresh
If the old finish is intact but faded, chalky, or just dulled, you can start at 120-grit instead of 80. This is enough to scuff and degloss the old surface without cutting all the way through it. Move to 150, then 180, then 220 if needed. This lighter approach is appropriate for teak or hardwood furniture that only needs one or two seasons of grime removed before re-oiling.
Metal furniture rust removal

For surface rust on steel or wrought iron, start with a wire brush wheel or flap disc (40 or 60-grit) to knock off the bulk of the rust and loose paint. Move to 80-grit with the random orbital to level the surface, then 120-grit to prep for primer. For deep pitting, a chemical metal prep product used between the mechanical sanding and primer application makes a significant difference.
Products like POR-15 Metal Prep, applied to bare metal and left wet for 15 to 25 minutes (or 25 to 45 minutes on heavily rusted sections), chemically convert residual rust and etch the surface for better primer adhesion. Rinse it off, let it dry completely, and prime the same day. Flash rust can re-form on bare steel within hours in humid air, so do not leave it overnight.
- 60–80 grit: Strip old paint, remove surface rust, take down heavy buildup
- 120 grit: Remove the coarse scratches, level the surface
- 150 grit: Intermediate smoothing pass
- 180 grit: Final prep before paint or solid stain
- 220 grit: Final prep before clear finish, oil, or stain where grain shows
Pads, discs, and dust control that actually matter outdoors
Hook-and-loop discs vs. PSA (adhesive-backed)
Hook-and-loop (Velcro-style) discs are the right choice for patio furniture work. You can swap grits in seconds without waiting for adhesive to release, which matters when you are changing grits frequently through a progression. PSA (pressure-sensitive adhesive) discs stick more aggressively and are slightly better for long production runs, but they are tedious to swap during refinishing work. Stick with hook-and-loop.
Interface pads for contoured surfaces
A foam interface pad installed between the sander's backing plate and the sanding disc allows the disc to conform slightly to curved surfaces instead of bridging across them. This is particularly useful on rounded tabletop edges, curved chair backs, and barrel-shaped legs. Without an interface pad, the rigid backing plate rocks on curved surfaces, leaving high-and-low sanding marks. They add a small amount of softness to the cut, so expect slightly slower material removal, which is actually a feature when you are working close to an edge or a profile.
Dust collection: do not skip this outdoors
Sanding outdoors does not mean dust is not a problem. Fine sanding dust from old paint, stain, or treated wood floats in the air and settles over a wide area. If you have older furniture that was painted before 1978, treat all the dust as potentially lead-containing until you know otherwise.
The EPA's guidance on renovation and painting activities is clear: sanding painted surfaces from that era is considered a lead-paint disturbance, and dry sanding generates the most hazardous airborne dust. EPA’s “Reducing Lead Hazards When Remodeling Renovating and Painting” guidance also notes that scraping or sanding generates less dust than dry scraping or dry sanding, underscoring why dry sanding is the most hazardous airborne-dust approach [dry sanding generates the most hazardous airborne dust](https://www. epa. gov/sites/default/files/documents/reduc_pb.
pdf). Use a random orbital with dust collection ports connected to a shop vac with a HEPA filter bag. Once the surface is prepped, choosing the best car wax for patio furniture helps seal and add water resistance before you move on to regular upkeep. Cover the surrounding patio area with poly sheeting to contain dust and chips.
Wear an N100 or P100 respirator, not just a dust mask, any time you are dry-sanding old paint. If you genuinely do not know the paint history of older furniture, assume lead and work accordingly.
For furniture you know is lead-free, a basic dust shroud kit on the sander (3M and other manufacturers offer shroud kits for 5-inch random orbitals) paired with a shop vac keeps the work area manageable. Change the sandpaper when it stops cutting cleanly or starts clogging with paint dust, and that happens faster outdoors where old finishes can be soft and gummy in summer heat.
Power, speed, and ergonomics for outdoor furniture shapes
Variable speed control is not a luxury feature here, it is genuinely useful. At higher orbits-per-minute (5,000 to 6,800 OPM), the sander removes material quickly for paint stripping. Drop the speed to 2,500 to 3,500 OPM for final smoothing passes and for any time you are working near an edge, detail, or end grain. Running too fast at the end of a project is a common source of swirl marks that only become visible once the finish goes on.
For multi-mode sanders like the Festool Rotex series (which switches between rotary and random orbital modes), the rotary mode at lower RPM (the Rotex RO 90 runs 260 to 520 RPM in rotary mode) is very effective for aggressive paint removal, while random orbital mode handles finish prep. These are premium tools, and for most homeowners doing one or two pieces a year, a quality mid-range variable-speed random orbital does the same job. The key specs to look for: variable speed, a quality hook-and-loop backing plate, and dust collection port compatibility.
Ergonomics matter more than most people expect when you are working on furniture for two or three hours. Chairs require constant repositioning, flipping, and working at awkward angles. A palm-grip random orbital is more comfortable than a right-angle grip for overhead or vertical work. Keep the sander moving at all times, use light to moderate pressure (let the abrasive do the cutting), and take breaks. Pressing harder does not sand faster, it just clogs the paper and burns the wood.
What to do after sanding: the refinishing workflow
Sanding is prep work, and its value is entirely determined by what you put on top of it. The finish you choose should match the material and your climate. For most patio projects, the best oil for patio furniture is one formulated to resist moisture, UV, and mildew. This is where the work you just did either gets protected for years or starts failing in one season.
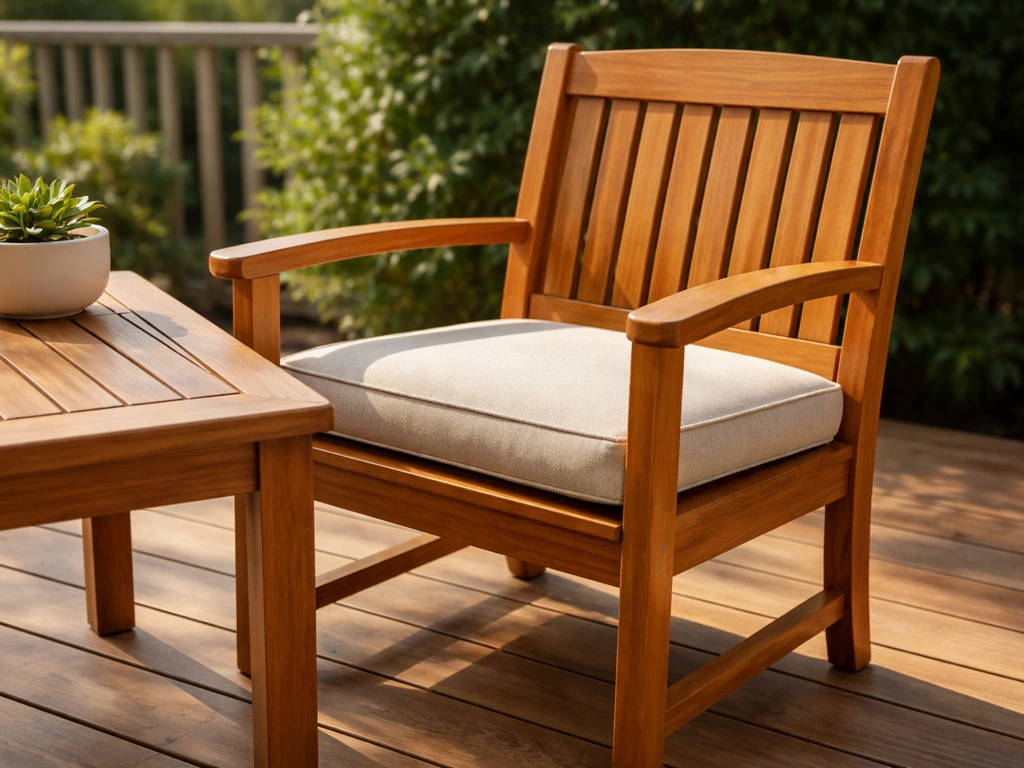
Wood furniture
For hardwoods like teak, ipe, and eucalyptus, a penetrating teak oil or outdoor-formulated wood oil applied after a 180 to 220-grit final pass gives the best combination of protection and natural appearance. These oils soak into the grain rather than forming a surface film, so they will not peel or crack when the wood expands and contracts seasonally.
For softwoods like pine and cedar, a penetrating sealer or a solid-color exterior stain over a compatible primer typically lasts longer than a clear film finish, which cracks and peels as the softer wood moves. If you want paint, prime with an exterior wood primer after sanding, then apply two coats of exterior paint. In high-humidity climates (Florida, Gulf Coast, Pacific Northwest), choose a mold-resistant exterior formula.
In desert climates (Arizona, New Mexico), UV degradation is the primary threat, so UV-stabilized finishes matter most. Choosing the right finish is as important as the sanding itself, and it is worth researching the best finish for your specific wood type before you open a can.
Metal furniture
After mechanical rust removal and chemical metal prep (if applicable), prime bare steel with a rust-inhibiting metal primer the same day you sand. Do not leave bare steel overnight in humid air. Two-part epoxy primers bond better than rattle-can options for furniture that lives outside year-round. Over the primer, use an oil-based enamel or a direct-to-metal topcoat. For aluminum, a self-etching primer improves adhesion before topcoat. In coastal environments with salt air, rust recurrence on steel furniture is almost guaranteed without quality primer and topcoat, plus annual inspection and touch-ups on any chips. Choosing the best UV protection for patio furniture starts with a quality primer and topcoat rated for outdoor sun exposure.
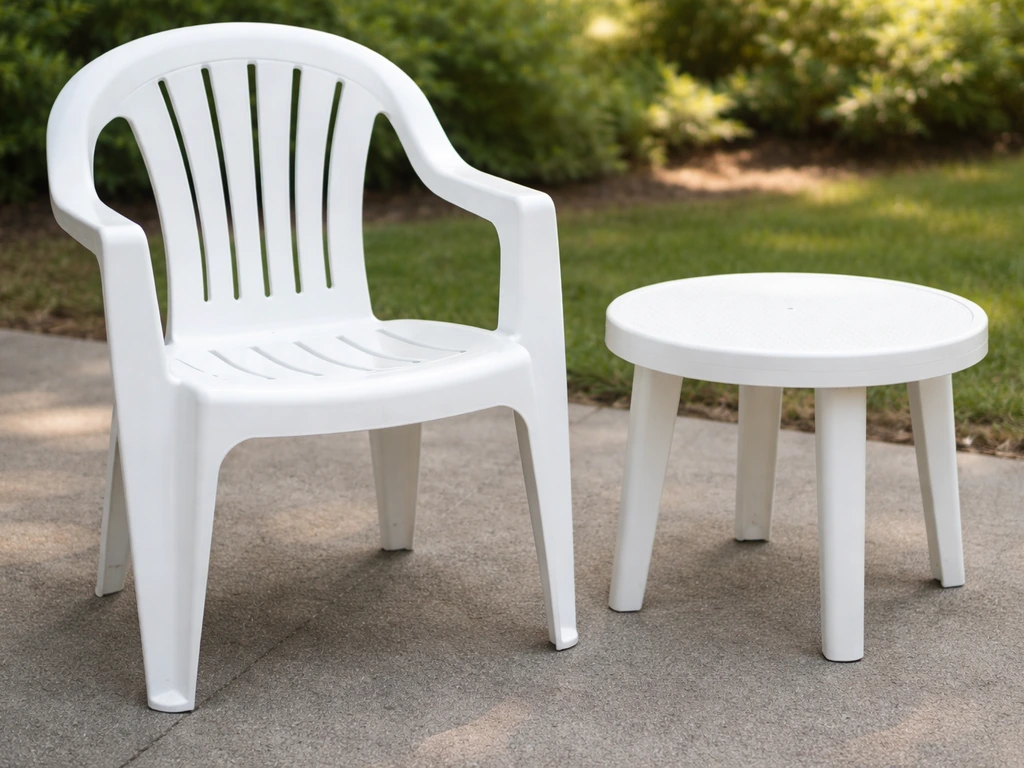
Composite and plastic furniture
Composite and plastic furniture generally does not need refinishing the way wood does, which is part of why people buy it. If you need to repaint plastic furniture, light hand-sanding to 120-grit to scuff the surface is enough, followed by a plastic-bonding primer and a paint formulated for plastic or multi-surface use. For best results, use the right topcoat designed for plastic patio furniture so it bonds well and holds up outdoors paint formulated for plastic or multi-surface use. Power sanding composite with anything coarser than 150-grit or at high speed risks melting and distorting the surface texture permanently.
Common mistakes, problems, and how to fix them
Swirl marks showing under the finish
This almost always means the grit progression was rushed. If you see circular scratches under stain or a clear coat, you skipped a grit step or ran the sander too fast during the final smoothing pass. The fix is to sand back through the sequence properly. Start at the grit where you left visible scratches, work through the intermediate grits, and do the final pass at 220 with light pressure at reduced speed, keeping the sander moving constantly in overlapping passes. For the best finish on wood patio furniture, aim for clean, smooth prep so stain or oil goes on evenly and lasts through outdoor use final pass at 220.
Gouges and sanded-through spots
Gouges usually come from dwelling too long in one spot with a belt sander or from running a random orbital at full speed on a thin slat without keeping it moving. Sanded-through spots on painted or stained wood are a bigger problem and usually require wood filler, re-sanding, and spot-priming before you can continue. Next time: keep the sander moving, use lighter pressure near edges and end grain, and do your initial heavy removal with 80-grit before stepping down to finer grits. You cannot recover material you have removed.
Clogged sandpaper
Old paint, especially latex paint softened by summer heat, loads up sanding discs very fast. A clogged disc stops cutting and starts burnishing, which glazes the wood surface and reduces finish adhesion. Change the disc when it stops feeling aggressive. Stearate-coated discs (labeled non-loading or no-load) resist clogging better than standard aluminum oxide discs and are worth the minor price difference for paint-stripping work.
Rust coming back on metal furniture
Flash rust can appear on bare steel within hours of sanding, especially in humid weather. If you see orange staining appear before you have primed, you need to either re-scuff with 120-grit and prime immediately, or apply a chemical converter. Rust that comes back quickly after you have applied primer and paint usually means the original rust was not fully removed before priming. Mechanical removal followed by a chemical metal prep step is the most reliable way to prevent recurrence. In coastal climates, using a rust-inhibiting topcoat rated for marine or coastal exposure is not overkill, it is the minimum.
Raised grain after the first coat of finish
Water-based finishes and stains raise the wood grain, creating a rough, fuzzy surface after the first coat dries. This is normal and not a sanding failure. Let the first coat dry completely, then do a very light pass with 220-grit by hand along the grain to knock down the raised fibers. Wipe off the dust and apply the next coat. Do not sand aggressively between coats or you will cut through the first coat on edges and high spots.
Lead paint safety reminders
If the furniture is older and you do not know its paint history, treat the old paint as lead-containing. Dry sanding is one of the highest-dust-generating activities the EPA flags in its renovation and painting guidance. Work outside, use poly sheeting to contain chips and dust in the work area, wear a P100 respirator (not a paper dust mask), and bag all the debris for proper disposal. Wet-misting the surface slightly before sanding reduces airborne dust but makes the paper clog faster, so it is a trade-off. When in doubt about an old piece, consider chemical stripping rather than power sanding as the lower-dust alternative.
FAQ
Can I sand a whole patio set with a 5-inch random orbital, or will I need more tools?
Yes, but only for the parts where you need true flatting. Use a 5-inch random orbital for door-like panels and wide flat runs, then switch to hand sanding or a detail sander for spindles, chair arms, and joints where the edges round over. If you try to force a flat-pad tool into corners, you either miss spots or create uneven sanding ridges that show through the finish.
Is higher speed always better when using the best sander for patio furniture?
Not usually. For wood, the final smoothing stage should be done with reduced speed and light pressure, and you can achieve that with the correct grit progression. For composite and plastic, power sanding is the risk point, so you should avoid high speed and aggressive grits even if the job feels “fast.”
What feature matters more for patio furniture sanding, variable speed or pad size?
For most refinishing, you want variable speed, not maximum power. If your model lacks speed control, it tends to remove too aggressively on edges and end grain, which increases swirl marks and gouge risk when you slow down or pause. Variable speed lets you strip faster, then finish smoother without changing tools.
Why are hook-and-loop sanding discs recommended, and what should I do if they keep slipping?
Hook and loop discs are the practical choice because you can swap grits quickly without solvents or waiting for adhesive release. If your discs keep popping off, check that the backing plate is clean and that you fully seat the disc, press on it briefly, and do not over-torque the spindle screw. Also confirm the disc is the same diameter and the correct grit-backing interface.
Do I need a foam interface pad for patio furniture sanding?
A foam interface pad helps prevent bridging on curved edges and rounded chair legs, but it slightly slows cutting and can leave a gentler profile. If you are trying to remove thick paint on a curved part, you may need more passes rather than expecting the pad to behave like a hard backing. For flat tabletops, you can often skip it for faster material removal.
How do I avoid sanding through thin slats or rounding over edges?
If you are working close to a sharp edge, the safe move is light pressure, lower speed, and keep the sander moving in overlapping passes. For end grain and thin slats, do not linger, and consider finishing those areas by hand with a folded sheet or contour block after the random orbital does the bulk work.
What grit should I stop at before staining, oiling, or painting patio furniture?
It depends on the finish, but for visible-grain results, do not stop too early. As a general rule from the best workflow, plan a final pass at 220 grit for staining or clear oil, and for paint you can generally stop at 180 only if your surface already looks uniform and you will use an exterior primer and topcoat. Test a small hidden area to confirm the sheen and scratch visibility.
How soon do I need to prime after sanding steel patio furniture?
If bare metal is left exposed in humid or coastal air, flash rust can begin quickly, even before you “feel” like you are done. Treat it like a same-day workflow: mechanical rust removal, chemical metal prep if needed, then primer the same day. If rust blooms appear, re-scuff and either prime immediately or apply a converter step.
What’s the most common cause of scratches showing under stain or clear coat, and how do I fix it?
For paint stripping, you can use coarser grits, but do it in a controlled progression and do not rely on one grit forever. Once the surface is uniformly cleaned to the right substrate, switch up one grit step at a time (do not skip more than one step). Skipping grits is the most common reason scratches reappear under stain or clear coats.
Is dust control really that important when sanding patio furniture, and what PPE should I use?
Yes, especially on older painted pieces. Use dust collection with a HEPA-filtered shop vac when possible, and wear a respirator rated for fine particulates, not just a disposable dust mask. Also bag and dispose of debris promptly, since dry sanding can generate hazardous dust if the paint contains lead.
Can I power sand composite or plastic patio furniture to prep it for paint?
For composite or plastic, hand scuffing is the safer route. If you need to prep for repainting, light sanding around 120 grit by hand or with a sanding block is usually enough, then use a plastic-bonding primer and an exterior topcoat designed for plastic or multi-surface use. Avoid aggressive power sanding that can permanently melt or distort embossed texture.
What should I do if the wood raises grain after the first coat of finish?
Because raised grain and fuzziness can happen after you apply water-based products, you may need a knockdown pass. After the first coat dries fully, lightly sand with 220 grit by hand along the grain, wipe dust off, and apply the next coat. Avoid aggressive between-coat sanding, especially on edges, or you can cut through the first layer.
If I still see swirl marks after sanding, how do I correct them?
If you see circular swirl marks, the most likely causes are rushed grit progression or leaving the sander running too fast during the final smoothing pass. The fix is to sand back to the point where the scratches start (the previous grit level), then finish with a reduced speed and light pressure while keeping constant motion. You cannot remove those marks later with just “more topcoat.”
Next Articles

Best UV Protection for Patio Furniture: Choose and Apply
Pick the best UV protection for patio furniture by material, prep, coats, and climate to prevent fading, cracking, and b
Best Oil for Patio Furniture: Teak, Wood Types, and Steps
Choose the best oil for patio furniture by wood type, fix current finishes, and apply steps for lasting water and UV pro
Best Paint for Plastic Patio Furniture: What Works
Pick the best paint for plastic patio furniture: prep, primers, spray vs brush, finish, curing, and lasting outdoor resu